Intro
This is a version of my “Migrating SQLite Databases to MySQL (Django)” specifically tailored to the PCARI project.
Prerequisites/Assumptions:
- You are using OS X or Ubuntu 16.04
- Your webapp is using Django 1.10.x with Python 2.7
- You have an existing database in SQLite
Step 1 (OS X): Downloading and Setting Up MySQL
You can skip this step if you already have MySQL set up on your computer.
First, we will download and set up MySQL using instructions here. I used the native package installer rather than the TAR. Make sure to save the temporary root password they give you! Once MySQL is installed, we will set up a launch daemon that allows MySQL to start up on system/terminal launch.
After you finish installing, double check that your server is running. On Mac OS, you can do this my going to System Preferences > MySQL. If not, you can turn it on through that menu.
Step 1 (Ubuntu): Downloading and Setting Up MySQL
You can skip this step if you already have MySQL set up on your computer or server.
If you are using Ubuntu, you can install using
$ sudo apt-get update
$ sudo apt-get install mysql-server
You will be prompted to set up a root password. Don’t forget it, as you will use it later! Then, run the security script to configure MySQL.
$ sudo mysql_secure_installation
To test MySQL is working, enter
systemctl status mysql.service
And you should see an output like
● mysql.service - MySQL Community Server
   Loaded: loaded (/lib/systemd/system/mysql.service; enabled; vendor preset: en
   Active: active (running) since Wed 2016-11-23 21:21:25 UTC; 30min ago
 Main PID: 3754 (mysqld)
    Tasks: 28
   Memory: 142.3M
      CPU: 1.994s
   CGroup: /system.slice/mysql.service
           └─3754 /usr/sbin/mysqld
If MySQL isn’t running, start it using
sudo systemctl mysql start
Step 2: Finshing Up Installation
You can skip this step if you already have MySQL set up on your computer.
Try running mysql in terminal. You might get an error like “command not found”. If so, in terminal, configure your computer’s $PATH so it recognizes mysql as an exectutable:
$ export PATH=$PATH:/path/to/your/mysql/bin
For me, the command was was
$ export PATH=$PATH:/usr/local/mysql/bin
Check and make sure that your terminal recognizes mysql now. You might still get a MySQL specific error, but that’s okay–we will fix that in the next steps.
Unfortunately, this fix only works temporarily. If you open a new terminal tab, you will have to do export PATH... again. To allow mysql to be a recognizable command every time, we will edit your computer’s bash profile. Open the bash profile using your preferred text editor:
$ vim ~/.bash_profile
In the file, copy-paste this:
# Set architecture flags
export ARCHFLAGS="-arch x86_64"
# Ensure user-installed binaries take precedence
export PATH=/usr/local/mysql/bin:$PATH
# Load .bashrc if it exists
test -f ~/.bashrc && source ~/.bashrc
The above code allows mysql to be recognized every time. Save the file, restart terminal, and it should work.
Step 3: Creating MySQL Users
NOTE: in this tutorial, we are altering the root user because it is assumed you do not have any other local users on your MySQL server. If you do, change the usernames accordingly
Now we are ready to use MySQL! Enter
$ mysql -u root -p
Log in using your root password. If this is your first time logging in, use the password that you saved in step 1. Now, if you want to change the root password to something of your own preference, in the MySQL shell, enter
mysql> ALTER USER 'root'@'localhost' IDENTIFIED BY 'your_new_password';
Now, you have your root user set up and can log into it using your own password.
Step 4: Creating the Project Database
Then, to create the database for your project (please be sure to name the database pcari to limit conflicts in version control):
mysql> CREATE DATABASE pcari CHARACTER SET UTF8;
mysql> GRANT ALL PRIVILEGES ON pcari.* TO root@localhost;
mysql> FLUSH PRIVILEGES;
mysql> QUIT
Step 5: Changing Django App Settings
Then, install the relevent dependencies in your Python environment using pip or conda:
$ pip install MySQL-python
If you are using a virtual environment for Python, make sure you have pip installed in your virtual environment before using the pip commands above, or else the dependencies will be installed globally.
Finally, in your settings.py file in your app, change the DATABASES section to the following:
DATABASES = {
    'default': {
        'ENGINE': 'django.db.backends.mysql',
        'NAME': 'pcari', #make sure your database name is 'pcari'
        'USER': 'root',
        'PASSWORD': 'your_password',
    }
}
A reminder that your_project_name should be the same name as the database you created in MySQL in Step 2. your_password is the same password that you use to log into MySQL.
We will need to add additional precautions to make sure your MySQL password is secure. We will set your password as an environmental variable, and access your password through the os module.
To allow your own user account to have access to the password, we will edit our .bashrc file, which sets system-wide configurations.
$ vim ~/.bashrc
At the bottom of the file, add
export mysql_pass="your_mysql_password" # make sure your environmental variable name is mysql_pass
This will set mysql_pass as an environment variable on your machine permanently.
Then, at the top of settings.py, write
import os
if it doesn’t already exist. We will then change our database configuration to be
DATABASES = {
    'default': {
        'ENGINE': 'django.db.backends.mysql',
        'NAME': 'pcari',
        'USER': 'root',
        'PASSWORD': os.environ.get('mysql_pass'),
    }
}
And you should be good!
Step 6: Make Migrations
We are in the home stretch! Now, all we need to do is apply any migrations you made to the new MySQL database.
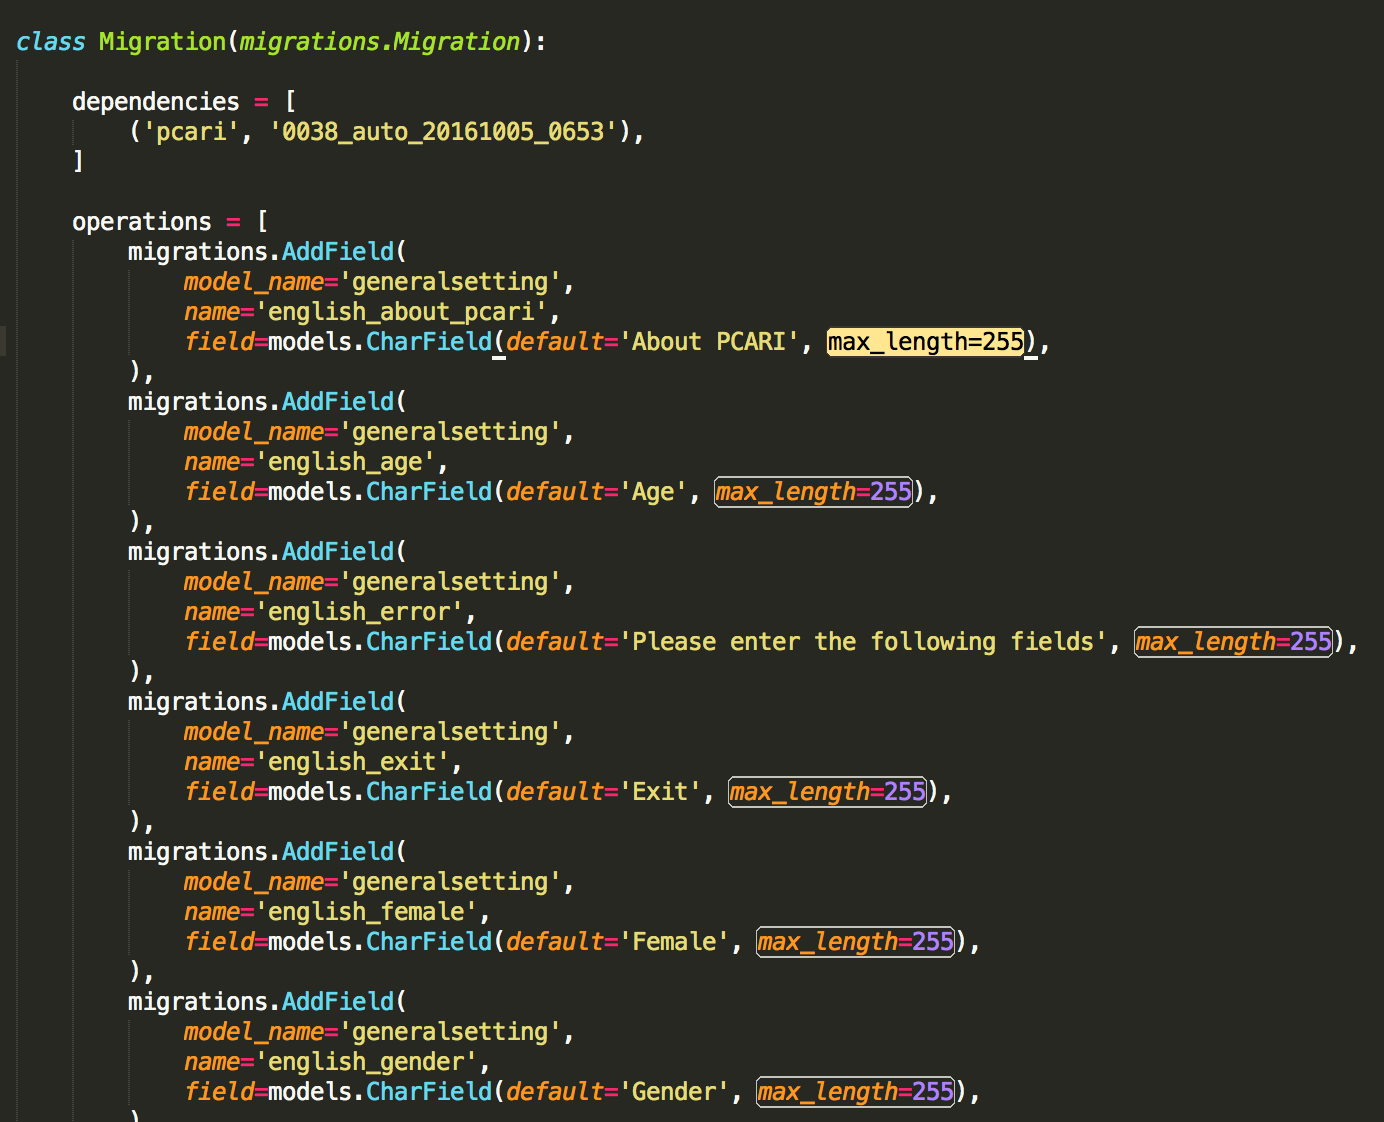
Before we do so, however, we also need to edit a migrations so we avoid an error when migrating. Go to malasakit-v1 > malasakit-django > pcari > migrations > 0039_auto_20161024_1727.py and and change all the max_length=30 and max_length=300 arguments to max_length=255` which is the conventional amount. This is because some input strings may be more than 30 characters long, so we need to account for that. You can do this in your text editor using any “find-and-replace” commands.
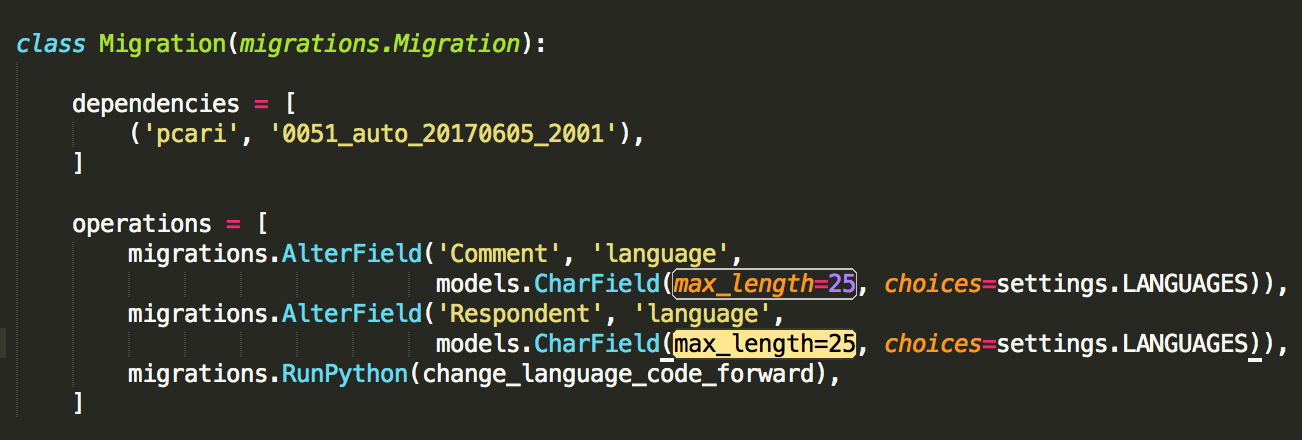
Also, in 0052_auto_20170609_1902.py and models.py I changed the max_length of langauge = models.Charfield to max_length=25. This is also to account for the differences in string length.
Finally, in 0049_model_refactor.py, I changed the default=0 value to default=None because MySQL complains when you have a default=0 attribute on a ForeignKey.

A Note
If your migration fails, you may need to do some debugging. Every case may be different, so I cannot give much advice here, unfortunately. However, if you want to retry a migration after making some changes, you will need to start with an empty database. To do that, we will DROP the database and create a new one. To do so:
mysql> DROP DATABASE pcari;
mysql> CREATE DATABASE pcari CHARACTER SET UTF8;
mysql> GRANT ALL PRIVILEGES ON pcari.* TO root@localhost;
mysql> FLUSH PRIVILEGES;
mysql> QUIT
Then, you can try the migration again. Ok, lets begin!
The details are all abstracted away for you, so all you need to do is run:
$ python manage.py migrate --run-syncdb
Do not run makemigrations, as Jonathan as written up a custom migration.
Finally, to load all the data from the old database, we checkout our git HEAD to an older commit, get a data dumpfile from that older db.sqlite3 file, and then switch back to our current commit. Here are the steps to doing so:
$ git checkout cc83f886101a96369cae20796f0433759b4a9ada  # This is the README update commit on `master` (using SQLite)
$ python2 manage.py dumpdata --natural-primary --natural-foreign > data.json
$ git checkout your_working_branch  # Go back to the latest commit on your working branch with the MySQL configuration
$ python2 manage.py loaddata data.json
You should see a message like
Installed 9522 object(s) from 1 fixture(s)
Step 7: Wrap Up
And that’s it! Now you have transitioned your webapp from SQLite to MySQL. While SQLite is quick, reliable, and useful for most development purposes, when your app transitions into production you often need to transition your backend database to fill the needs. And with this tutorial, you now know how!
If you are having trouble, here are some pages that I found helpful when working on this writeup:
https://www.digitalocean.com/community/tutorials/how-to-install-mysql-on-ubuntu-16-04
http://stackoverflow.com/questions/3034910/whats-the-best-way-to-migrate-a-django-db-from-sqlite-to-mysql
http://stackoverflow.com/questions/19189813/setting-django-up-to-use-mysql
https://docs.djangoproject.com/en/1.10/ref/databases/#mysql-notes
http://stackoverflow.com/questions/11546151/how-to-make-db-dumpfile-in-django